Today AWS is one of the leading cloud computing providers and we can safely say it’s the top trending one. The main reason for that is that they have a robust platform on which they offer a wide range of computing services in the segment of App Development, AI, Robotics, Security and even Satellites.
The top reason for their usage as a cloud computing provider is the fact that most of their services are made with scalability in mind, and that the tech part allows the final user to pay only for the resources which are actually in use without commiting to a fixed period license or hidden fees on large contracts. This fits into the Serverless definition.
They even have a minimum threshold for their resources usage which guarantee you with a free layer of their services. For example, you can start the development of an API using API Gateway, Lambda, Cognito and Database, and that will cost you nothing.
So, how should you start the development process? The most common way is going into each of the services on the AWS console and start configuring those per your needs. This works but will not give you the ability to recreate the stack from scratch, let’s say, to test it offline or deploy it as a new environment, and it lacks versioning and code handling which you would normally be used to.
In this situation is where the Serverless Framework comes into play. This framework allows us to build and deploy serverless applications using all AWS services (beside others as Azure or Google) which will be actually coded into templates.
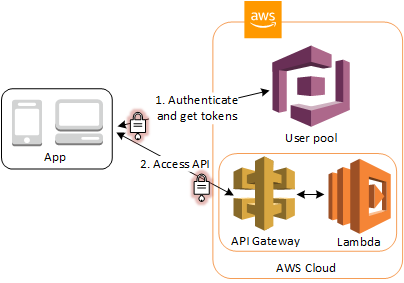
So, let’s put our hands to work. The plan is to build a small API which will allow authenticated users to create their todos. From the AWS services we will be using Cognito to handle our users and Auth flows, Dynamo DB to store data, API Gateway to create and expose our REST API and Lambda to code our Typescript logic which will resolve each endpoint.
The Auth flow will enable users to access our API through API Gateway. API Gateway will validate the tokens from a successful user pool authentication, and will use them to grant our users access to API endpoints.
Let’s Dive In
As a prerequisite, you need to have an AWS account and the Serverless Framework installed.
After having those setup, you must grant the Serverless Framework access to AWS, you can do it by creating an AWS Access Key and set the credentials on Serverless.
Now that we are ready, let’s create a directory and initialize our serverless project by running:
$ mkdir todos && cd todos
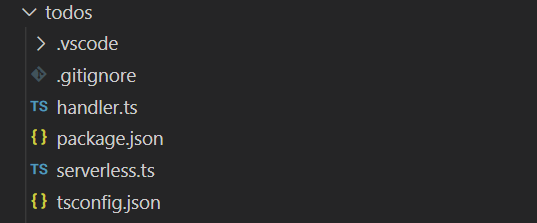
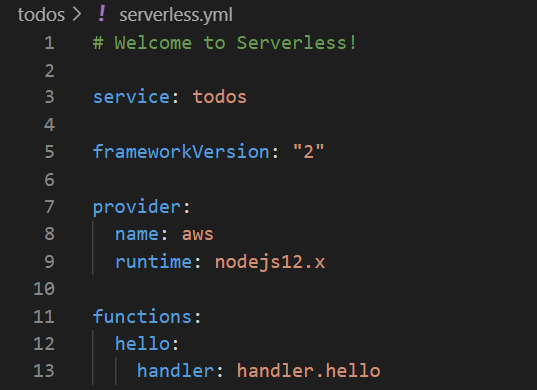
$ serverless create --template aws-nodejs-typescriptThis will create several files relevant for the typescript template, including a function called handler and a serverless.yml which is the main file that serverless uses to build and deploy the resources.
The serverless.yml includes the basic configuration that allows the building and deploying to the AWS platform. In this case a service name related to your app, a provider which is related to AWS platform, and a function which is later deployed as a Lambda on AWS.
By default, when deploying the app, the serverless framework creates basic resources to build and deploy this app. It includes a versioned Lambda and a Log Group for each function, an S3 bucket to handle the deployment, and a Lambda Execution Role which is required to invoke the Lambdas.
The next step is to set up the other AWS resources we are going to use on our serverless app. We will do this by using the AWS SAM template specification, which provides a simple and clean syntax to describe the functions, APIs, permissions, configurations, and events that make up a serverless application. This is later translated into a CloudFormation on deployment.
For that purpose, we let’s create a folder on the project root called “aws”, where we are going to define each resource on a file using the SAM specification.
For Cognito we created a cognito.yml file inside the aws folder with the template to create required resources:
Resources:
  CognitoUserPool:
    Type: "AWS::Cognito::UserPool"
    Properties:
      UserPoolName: todos-cognito-user-pool
      UsernameAttributes:
        - "email"
      AutoVerifiedAttributes:
        - "email"
      VerificationMessageTemplate:
        DefaultEmailOption: CONFIRM_WITH_LINK
  CognitoUserPoolClient:
    Type: "AWS::Cognito::UserPoolClient"
    Properties:
      ClientName: todos-cognito-user-pool-client
      UserPoolId:
        Ref: CognitoUserPool
      ExplicitAuthFlows:
        - "ALLOW_USER_PASSWORD_AUTH"
        - "ALLOW_REFRESH_TOKEN_AUTH"
      PreventUserExistenceErrors: "ENABLED"
      SupportedIdentityProviders:
        - "COGNITO"
  UserPoolDomain:
    Type: "AWS::Cognito::UserPoolDomain"
    Properties:
      UserPoolId:
        Ref: CognitoUserPool
      Domain: "${self:service}-${self:provider.stage}"
  ApiGatewayAuthorizer:
    DependsOn:
      - ApiGatewayRestApi
    Type: AWS::ApiGateway::Authorizer
    Properties:
      Name: todos-endpoint-authorizer
      IdentitySource: method.request.header.Authorization
      RestApiId:
        Ref: ApiGatewayRestApi
      Type: COGNITO_USER_POOLS
      ProviderARNs:
        - Fn::GetAtt: [CognitoUserPool, Arn]
We create a user pool, user pool client and gateway authorizer.
- The pool is the collection of users and their info.
- The client is the ability to login using the SDK or the CLI.
- The gateway authorizer allows for securing our endpoints with Cognito user pools based on access tokens.
For the database we created a dynamodb.yml with the template to create a DynamoDB instance. Since we want many users to use our app, we need to design our schema so that every user will have access only to his todos. We will utilize DynamoDB partition system and design our schema to use a composite identification – a partition key representing userId combined with a sort key representing a todoId.
Resources:
  TodosDynamoDbTable:
    Type: "AWS::DynamoDB::Table"
    DeletionPolicy: Delete
    Properties:
      AttributeDefinitions:
        - AttributeName: userId
          AttributeType: S
        - AttributeName: todoId
          AttributeType: S
      KeySchema:
        - AttributeName: userId
          KeyType: HASH
        - AttributeName: todoId
          KeyType: RANGE
      ProvisionedThroughput:
        ReadCapacityUnits: 1
        WriteCapacityUnits: 1
      TableName: ${self:provider.environment.DYNAMODB_TABLE}
Next we integrate these resources into our serverless project like this:
resources:
  - ${file(aws/cognito.yml)}
  - ${file(aws/dynamodb.yml)}
Now that we have the “basic” AWS resources it is time to create our endpoints, which will be used to authenticate and serve the todos. For that we just need to work on our serverless.yml to create new lambdas and expose endpoints for them.
We first add the stage and environment properties into the provider. This will allow us to deploy our project on a particular environment and also define database parameters.
provider:
  name: aws
  runtime: nodejs12.x
  stage: dev
  region: eu-west-1
  environment:
    DYNAMODB_TABLE: ${self:service}-${opt:stage, self:provider.stage}
    COGNITO_USER_POOL_ID:
      Ref: CognitoUserPool
    COGNITO_CLIENT_ID:
      Ref: CognitoUserPoolClient
  iamRoleStatements:
    - Effect: Allow
      Action:
        - dynamodb:Query
        - dynamodb:Scan
        - dynamodb:GetItem
        - dynamodb:PutItem
        - dynamodb:UpdateItem
        - dynamodb:DeleteItem
      Resource: "arn:aws:dynamodb:${opt:region, self:provider.region}:*:table/${self:provider.environment.DYNAMODB_TABLE}"
We also added IAM permissions for our functions under the iamRoleStatements portion of the provider block.
Next, we add the lambdas and their endpoints with an individual package configuration. We need two public auth endpoints serving signup and signin. Other endpoints serving todos will be protected with authorizer. For the sake of simplicity we use HTTP proxy integration to a resource of /todos/{proxy+}. API Gateway applies a default mapping template to send the entire request to the Lambda function and transforms the output from the Lambda function to HTTP responses.
functions:
  todos-proxy:
    handler: handler.todos
    events:
      - http:
          path: /todos/signin
          method: post
          cors: true
      - http:
          path: /todos/signup
          method: post
          cors: true
      - http:
          path: /todos/{proxy+}
          method: any
          cors: true
          authorizer:
            type: COGNITO_USER_POOLS
            authorizerId:
              Ref: ApiGatewayAuthorizer
In the authorizer section we specify that our API will require a token of authenticated Cognito user.
Now that we have all the basics of the configuration part, we need to code our RESTful Api. We will be using Express framework and aws-serverless-express package. Lets start with our handler.ts file:
import awsServerlessExpress from 'aws-serverless-express';
import { APIGatewayProxyEvent, Context } from 'aws-lambda';
import { todosExpress } from './src/todos-express';

export const todos = (event: APIGatewayProxyEvent, context: Context) => {
  const server = awsServerlessExpress.createServer(todosExpress);
  return awsServerlessExpress.proxy(server, event, context);
};
Here, you will see the main function handler with the event and context being proxied to an express server located at ./src/todos-express.ts
The full definition of an api including the express server, routes, controller etc.. can be found on this GitHub repo.
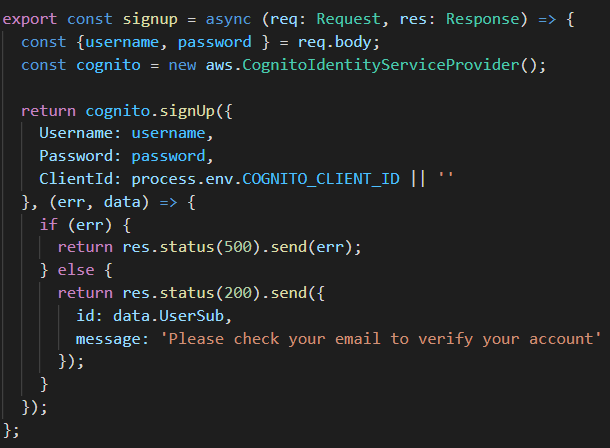
We will now focus on the controller methods supporting our endpoints . Let’s first add the authentication logic. To interact with Cognito, we will be using aws-sdk which is a global dependency available on the lambdas. The code for the signup is as follows:
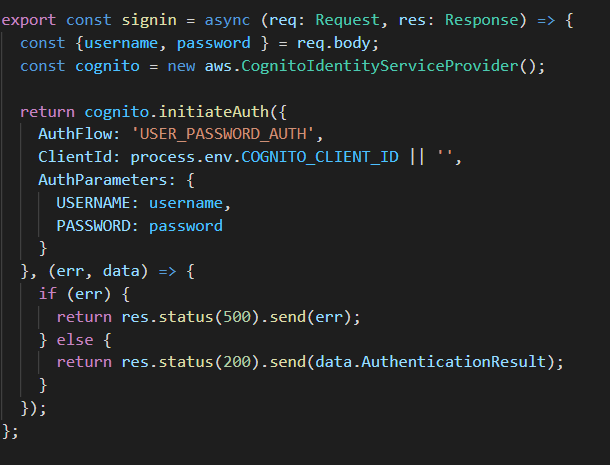
and the code for the signin:
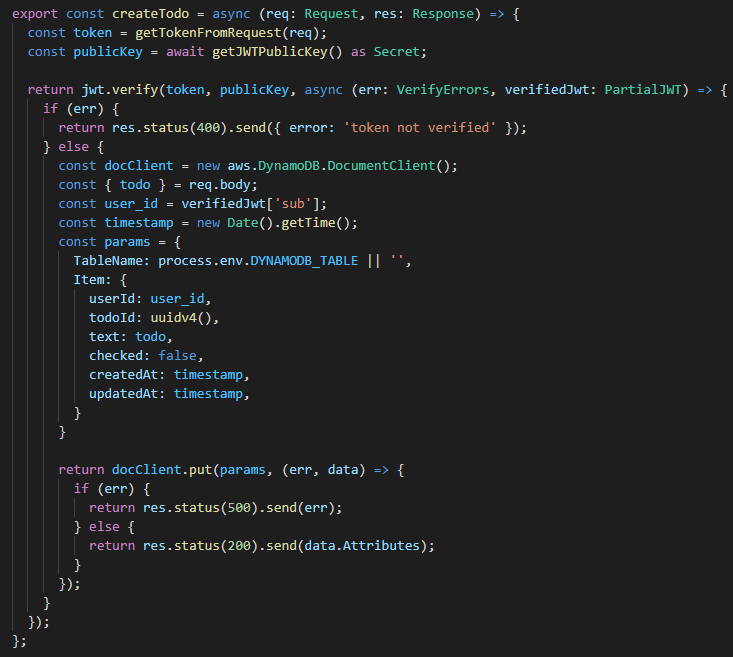
Now we need to create a code for adding and getting our todos. To interact with a DynamoDB we will be using the DynamoDB Document Client, which is the easiest and most preferred way. In order to add a new todo, we need to have a userId, which is our partition key. We get userId from the JWT token, which is included in the request. Decoded payload contains sub claim which is Cognito user id. You will find all the details related with JWT part of the app in the repo.
The code for adding a new todo will look like this:
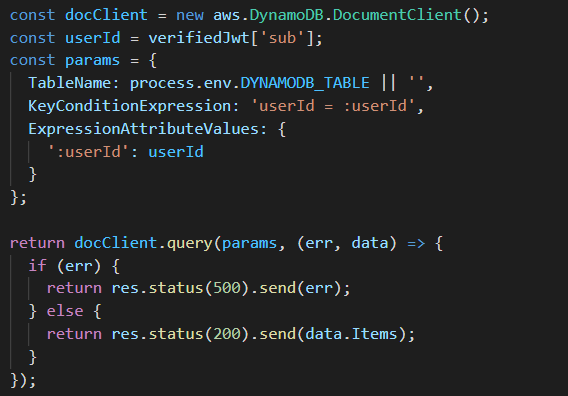
In order to get all user todos we need to query Dynamo table with the userId partition key:
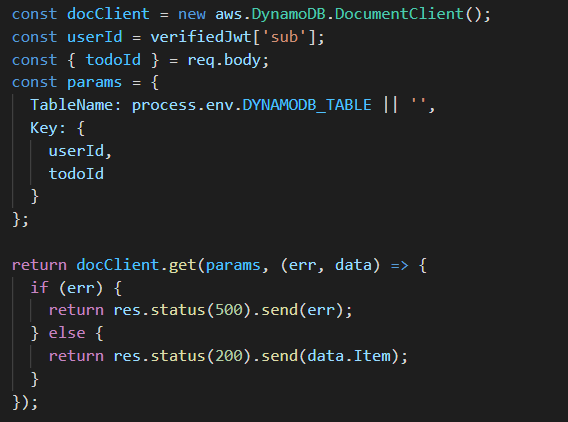
And for getting a single todo, we need to structure our query with combined partition and sort key, which in our case are userId and todoId:
And that’s it. You can write some more methods e.g.. to update a todo or delete it. It should be fairly easy now.
The next step is to deploy our serverless project. By default, it will deploy to a dev environment, and internally it will translate our stack into an AWS Cloud Formation.
$ sls deployFinally, after deploying, the serverless cli will output the service information with the endpoints we can consume.
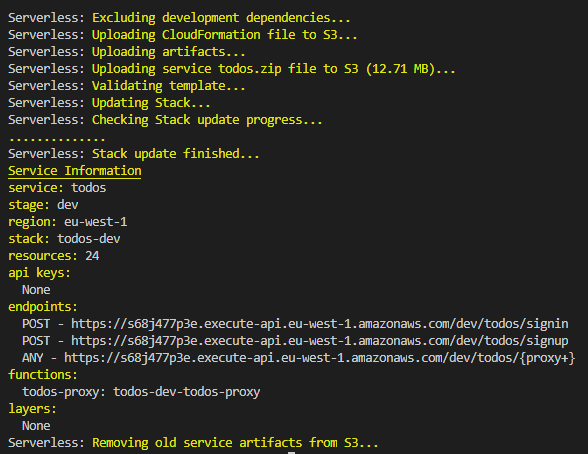
You can find the final result on our GitHub repo.
Let’s do some testing
Now we are ready to test. Let’s use postman. First we need to signup.
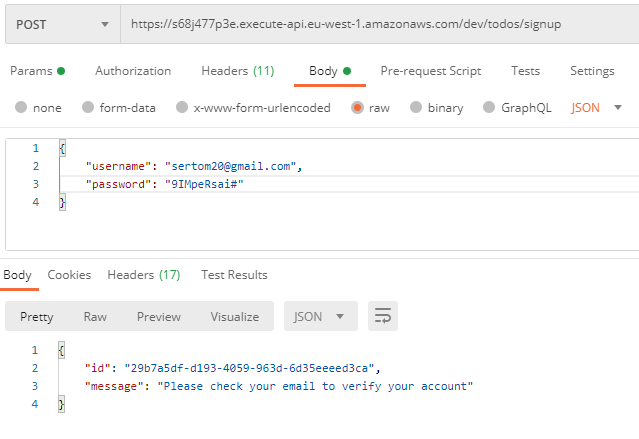
Great, the new account has been created. It still needs to be verified, before we can sign-in. Check your mailbox and click the verification link.

Now we should be able to sign-in
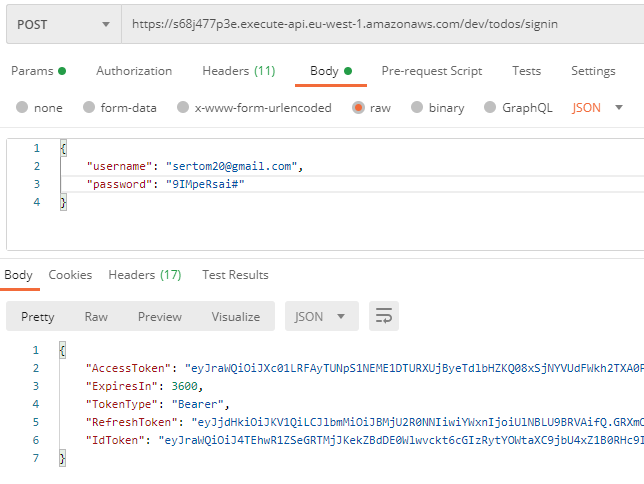
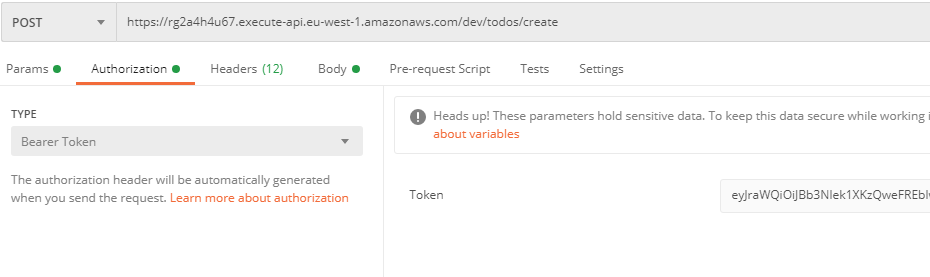
The response will include all the auth tokens provided by Cognito. Now, for the todos specific endpoints that require authentication, we need to take the IdToken and set it up as Bearer on the Authorization header like this:
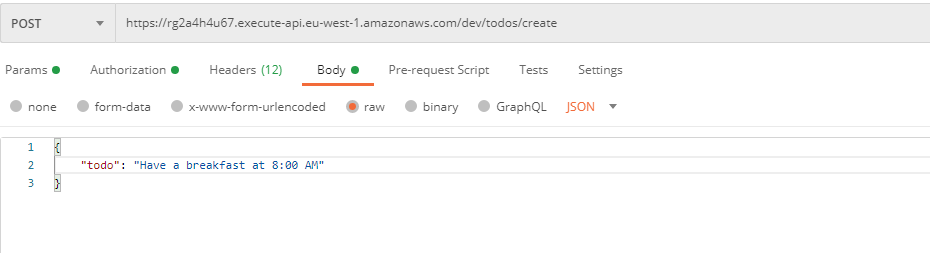
After that we can add a todo by consuming the create post endpoint like this:
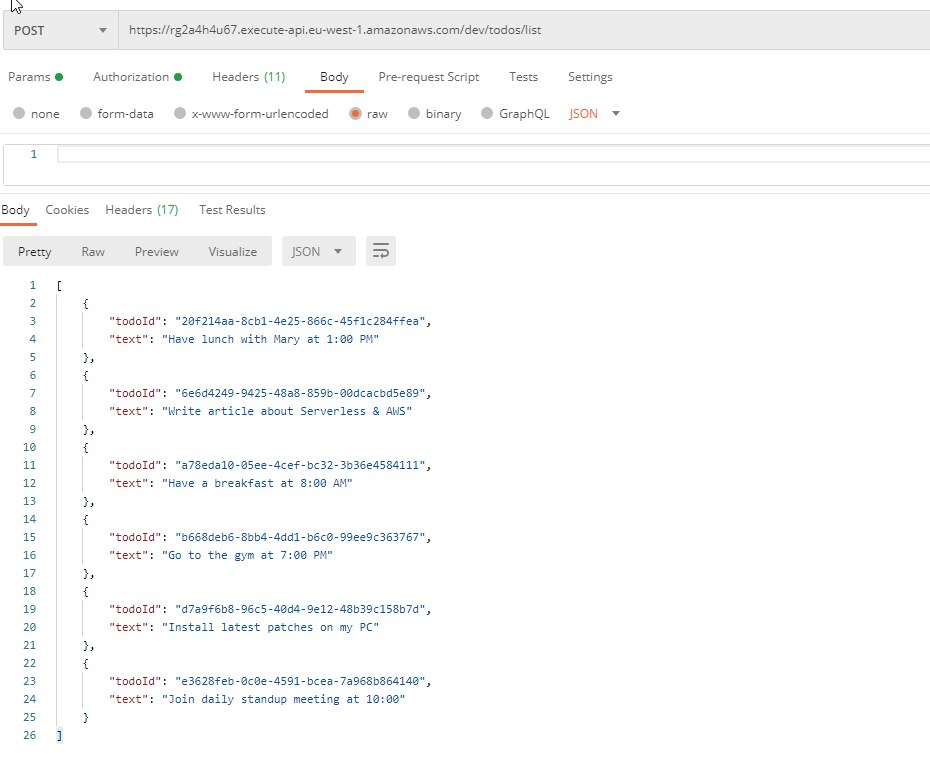
We will add couple of more todos and next we will retrieve all of them. For this we consume the list endpoint like this:
Finally we can get one todo with all the details by its id, like this:

Job well done! Recapping, we just developed a small REST API using a set of AWS resources, linked and handled within the serverless project.
Just remember not to update anything on AWS outside the serverless project because changes will be out of sync and the serverless project might not be deployable later. If you want to do updates you need to check the documentation of each resource and see which property update can be done with a stack update or a stack regeneration.
The full source code for this project can be found in this GitHub repo.